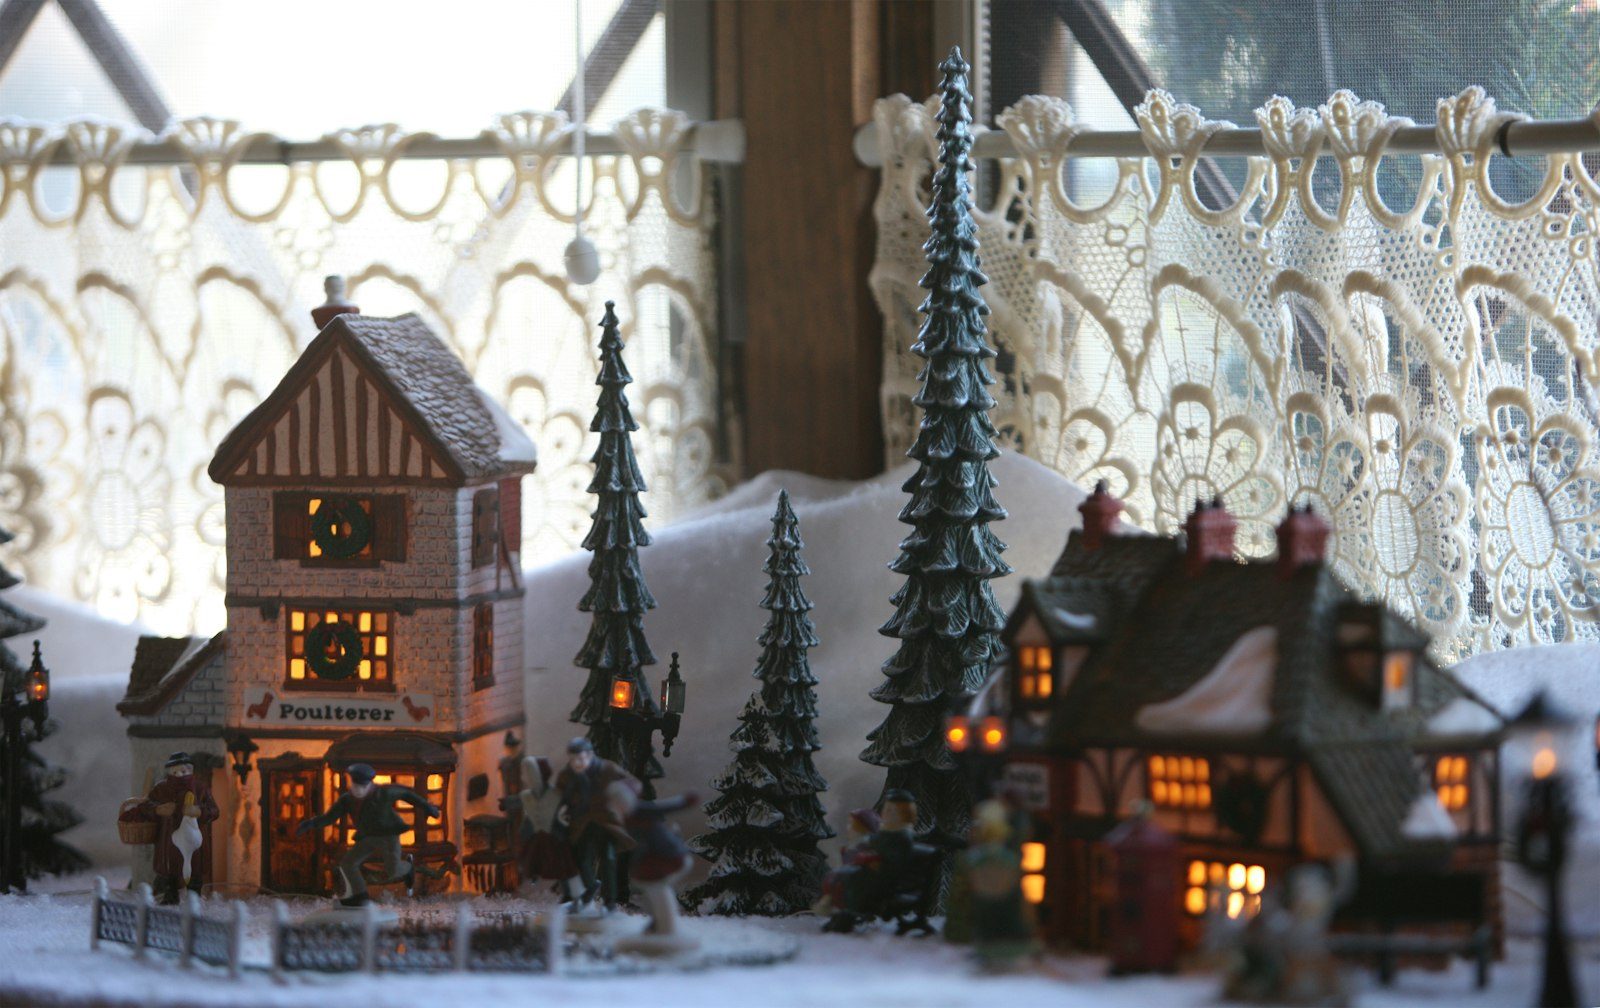
Christmas villages are the most quietly obsessive corner of holiday decorating. Nobody starts out as a “village person.” You buy one little lit house because it’s charming. Then a church. Then a lamppost. Then, three Decembers later, you’re rearranging furniture to accommodate a miniature town and explaining to guests why the bakery has to face east.
The houses are easy; the display is hard. These ten ideas cover the best spots in the house, lighting for actual magic, and January packing without crushing a single rooftop.
The Display Spots
1. The Entryway Console: The Grand Welcome
The console table in your entryway is the single best village spot in most homes. It’s at eye level, the first thing guests see, and usually deep enough (14-18 inches) for front and back rows. Tallest buildings at the back, smallest cottages in front, running the table’s full length.
The trick that separates a display from a pile: breathing room. A village crammed edge-to-edge reads as clutter; the same houses with an inch or two between them read as a town with streets. A white runner or white felt underneath unifies everything instantly.
Space: console 48–60 in. W fits 8–12 houses. Cost: $10–$20 for felt runner. Fine for renters. Storage: houses pack individually (see storage below).
2. The Mantel Village: Small but Mighty
A mantel can’t hold a sprawling village, but it can hold a perfect one. Five to seven houses, arranged in a shallow arc, with the fireplace as a dramatic backdrop — it’s the village equivalent of a haiku. This is the spot for your best pieces, not your whole collection.
Mantel space is shallow (8-10 inches), so go single-row with slight overlaps, tallest in the center. Battery tea lights hidden behind the houses make windows glow with no visible cords. Keep everything 12 inches from open flame.
Space: 5–7 houses on a standard mantel. Cost: $8–$15 for tea lights. Fine for renters. Storage: small count = easy packing.
3. The Windowsill Winter Scene
A village in a deep windowsill, viewed from outside at night, is pure Christmas-card magic. The lit windows glow through the glass, the snow outside (real or imagined) completes the scene, and passersby get the show for free. Deep sills — 6 inches or more — work best; shallow sills limit you to a single row of small houses.
Line the sill with white batting for snow, cluster 4-6 houses, and weave warm fairy lights behind them. Watch for condensation — put a waterproof layer (silicone mat or plastic sheet) under the snow base.
Space: 4–6 small houses per window. Cost: $10–$25 for lights and batting. Fine for renters. Storage: wipe houses dry before packing.
4. The Staircase Landing: The Overlooked Stage
If your staircase has a landing with a flat surface — a wide step, a landing shelf, a window ledge at the turn — you have a display spot most people never think of. A landing village gets viewed from slightly above as you come down the stairs, which is the ideal angle: villages look best from a gentle bird’s-eye view, the way you’d look at a real town from a hill.
A medium village (8-15 houses) suits this spot — viewed from above, you can pack denser than on a console since rooftops carry the visual weight. Dot museum putty under houses; stairs vibrate, and a village that migrates downhill is a January repair project.
Space: landing shelf 24–36 in. fits 8–15 houses. Cost: $5 for museum putty. Fine for renters. Storage: putty peels off clean.
5. The Bookshelf Village: Vertical Real Estate
Bookshelves are underrated village territory. Clear one or two shelves, and you have a multi-level display where each shelf is a “neighborhood.” The vertical arrangement reads beautifully — it’s the closest most of us get to a department-store window display.
White paper or felt on each shelf as snow, tallest pieces toward the back, and a fairy-light strand along each shelf’s front edge (wire tucked behind books). Vary shelf heights if you can, and leave some books in place — a village nestled among books looks curated.
Space: 1–2 shelves, 6–10 houses per shelf. Cost: $10–$20 for lights and felt. Fine for renters. Storage: shelf-by-shelf packing.
6. The Dining Room Sideboard: The Dinner-Party Backdrop
The dining room sideboard doubles as a dinner-party backdrop — wide, at serving height, in the room where you entertain.
Go long and low: a single row of houses the sideboard’s length, bottle-brush trees and lampposts filling gaps. Keep the center clear if you serve from it — a village blocking the gravy boat will be resented. Battery lights here; no cords across a serving surface.
Space: sideboard 60+ in. fits 10–15 houses in a row. Cost: $10–$15 for bottle-brush trees. Fine for renters. Storage: long and low = simple to wrap.
7. The Tiered Tray Village: Small-Space Magic
No console, no mantel, no sideboard? A two- or three-tiered tray (the kind used for serving) becomes a vertical village in about ten minutes. Each tier holds 3-5 small houses, and the whole thing sits on a kitchen counter, a coffee table, or a desk. It’s the apartment-dweller’s village.
Pick your five favorite houses rather than the full town. Drape fairy lights around the tray’s central pole, tuck white batting on each tier as snow — a complete village with a footprint smaller than a dinner plate.
Space: tray 12–15 in. diameter, 3–5 houses per tier. Cost: $15–$30 for the tray itself. Fine for renters. Storage: the whole tray stores assembled under a sheet.
8. The Fireplace Hearth: Ground-Level Grandeur
The hearth — the floor in front of the fireplace — holds the biggest village in the house: 20+ houses, streets, a skating pond (a mirror tile), a forest of bottle-brush trees.
Lay a large white sheet or faux-fur throw as the snow base to define the boundary and protect the floor. Arrange in zones: town center, tree outskirts, pond focal point. Run cords along the back edge, hidden behind the rearmost houses. One rule: with a working fireplace, the village stays 3 feet from the firebox.
Space: hearth 4–6 ft wide fits 20+ houses. Cost: $15–$30 for snow base and trees. Fine for renters. Storage: largest packing job — start early in January.
9. The Bedroom Dresser: The Private Village
Not every village is for guests. Five or six softly lit houses on the bedroom dresser — the version you see last thing at night and first thing in the morning.
Keep it simple: a white runner, favorite houses, one strand of warm lights. This is for the sentimental pieces — the first house you bought, the one from the trip, the church like your grandmother’s.
Space: dresser top fits 5–8 houses. Cost: $0–$10 (use what you have). Fine for renters. Storage: small and sentimental = pack with care.
10. The Rotating Display: The Collector’s Solution
When the collection outgrows the house, the answer isn’t a bigger house — it’s rotation. Display a third of the village this year, a different third next year, and the final third the year after. Every December feels fresh, every house gets its moment, and you never have to find display space for all of them at once.
Photograph each year’s arrangement before packing, and label boxes “year A / B / C.” Two-thirds of the collection stays packed, so you only need display space for one third — and each December’s “new” village genuinely feels new.
Space: display ⅓ of collection yearly. Cost: $0. Fine for renters. Storage: labeled boxes by rotation year.
Lighting the Village: Where the Magic Lives
An unlit village is a collection of small ceramic buildings. A lit village is a place. The lighting is not a detail — it’s the entire effect.
The hierarchy: Every lit house gets turned on — that’s the baseline glow. Then weave one strand of warm-white fairy lights through the display at ground level, tucked behind houses so you see glow, not wire. Two light sources, layered — that’s the whole recipe.
The color rule: Warm white (2700K) or nothing. Cool white reads hospital; multicolor reads carnival. The nostalgic village aesthetic lives and dies on warm light.
The cord problem: (1) Battery-operated houses and lights — no cords at all; (2) one power strip hidden behind the rearmost houses, all cords routed behind; (3) cord covers. Never run cords across the front — if you can see the cord, the magic is broken.
Timers: Put the display on a timer or smart plug, dusk to bedtime. A village that lights itself feels alive; one you must remember to switch on feels like a chore by week two.
Space: 1 strand fairy lights per 3 ft of display. Cost: $10–$20 for lights + $10 for timer. Fine for renters. Storage: coil lights loosely; never wrap tight around houses.
January Storage: Houses Are Fragile
Ceramic and porcelain miniature buildings chip, crack, and crush with enthusiasm — the houses are easy to buy and hard to keep.
The non-negotiable rule: Wrap every house individually. One layer of bubble wrap or two of packing paper per house, taped closed. Houses stored touching each other will damage each other — vibration does the rest.
The box method: Sturdy boxes, single layer, crumpled paper in every gap. If a house can shift, it will shift, and shifting means chipping. Label every box (“Houses A-D, church, lampposts”) — future-you will be grateful.
Original packaging: Fitted foam inserts are the best protection a house will ever have — use them if you kept them. Either way, village boxes go on the top shelf, never under heavier items.
Lights and accessories: Coil light strings loosely and bag separately — tangled lights wrapped around houses snap chimneys off. Bottle-brush trees get their own bag; tiny accessories share one padded box, each in tissue.
Total January time for a 20-house village: about 90 minutes. Least fun part of the hobby, and the reason your village survives to next December.
Space: one box per 6–8 houses. Cost: $10–$20 for bubble wrap and boxes. Fine for renters. Storage: top shelf only; never stack heavy items on village boxes.
FAQ
How many houses do I need to start a village? Three to five: an anchor building, two or three houses, a couple of trees. That’s a complete mantel or tray scene — the village grows a piece or two each year.
Are the expensive brand-name villages worth it? Big names like Department 56 make heirloom-grade pieces that last decades. But $10-$20 craft-store houses look charming in a well-lit display, especially beside a few nicer anchors. The display matters more than any single house — spend on lighting and the base, save on fillers.
My village houses have different scales. Is that a problem? Only side by side. Fix it with zoning: group same-scale houses in “neighborhoods” with distance between zones. The eye reads each cluster independently.
Can I leave my village up after Christmas? A lit winter village reads as “winter” through January. Past that it reads as “didn’t get around to packing” — your guests will notice.
The Verdict
A Christmas village gets better every year — each house a memory, each December the town grows. The display turns ceramics into a place: one good spot, warm light, hidden cords, room to breathe. In January, wrap every house individually — the village you pack carefully is the one you’ll still grow in ten years. Start with three houses and a strand of lights.